


What is Roller Burnishing?
This process enables fast and repeatable finishing of metal surfaces to mirror-like quality, but without removing any metal.
How do you finish the surface of a metal part to a mirror-like sheen without putting it through an abrasive process like grinding? For some applications, roller burnishing could do the trick without actually removing any metal from part.
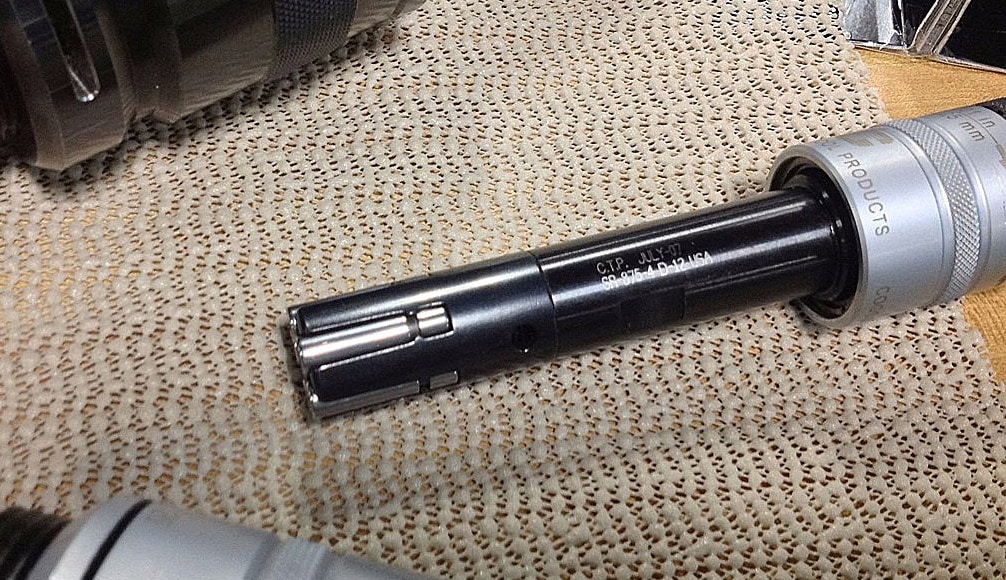
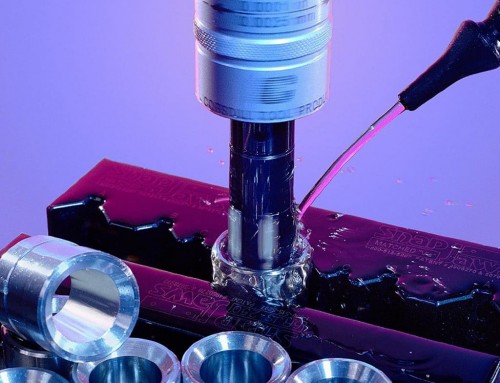
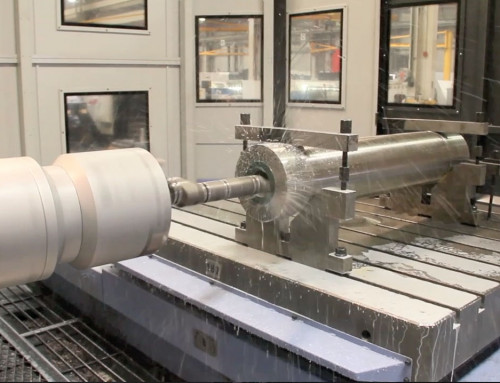
In basic terms, burnishing is a method for polishing a surface, such as metal, through sliding contact with a harder object. The burnishing tools offered by Cogsdill Tool for machining metal use highly polished tapered steel rollers, as you can see in the photo above.
Different Approaches to Finer Roughness Values
Machining a metal surface leaves microscopic peaks and valleys that are called roughness. Surface finishing, whatever the method, is about reducing the roughness average (Ra) value of the surface. Basically, the Ra value is a formula that measures the average distance between the tops and bottoms of these points relative to the mean line, which cuts through them. The finer the surface finish, the shallower the valleys and shorter the peaks.
The first noticeable difference between abrading and burnishing a surface to accomplish this peak and valley reduction is that the former removes metal from the part while the latter does not. Abrasive finishing cuts or tears away the peaks in the surface, thereby bringing the average peak and valley distances closer together. But Cogsdill says that this also leaves sharp projections in the contact plane of the machined surface. Burnishing doesn’t have this problem. At first glance, a burnished part looks as if the metal surface has been smeared smooth. But that would be incorrect. The burnishing tool’s polished and hardened rollers actually perform cold flowing of the surface and subsurface material, which results in a controlled plastic deformation of the part.

This roller burnishing tool from Cogsdill is designed for bottoming operations, as the rollers extend slightly from the end of the toolholder. The rollers spin against the part surface, applying pressure that causes the subsurface material to cold flow, evening out the surface peaks and valleys that together we call “roughness.”

This diagram shows a hypothetical part surface profile before and after roller burnishing. The end goal, as in any finishing process—abrasive or not—is to reduce the distances between peaks and valleys. Abrasive finishing tears off metal from the peaks, while roller burnishing accomplishes the same result without metal removal.

This sample part shows the surface finish before and after roller burnishing. The unburnished surface is on the left, the burnished surface on the right. Using Cogsdill’s Roll-a-Finish tools, this finish was achieved in about 1.5 seconds.
Not What It Looks Like
Material deformation comes in two varieties: elastic and plastic. Elastic deformation occurs when stress is applied at a pressure below the material’s yield point; bend a piece of plastic a little, and it bends back. Plastic deformation, on the other hand, is permanent, a result of stress at a pressure above the yield point of a given material. Crushing an aluminum can, for example, is plastic deformation.
To stick with the analogy of a soft cylinder, imagine squeezing the opposite, undimpled sides of a dimpled container to push the dimples out. That’s a bit reminiscent of what happens when roller burnishing a metal part surface.
The diagram in the slideshow above shows a profile of a hypothetical part surface before and after roller burnishing. The cold-flow effect of the rotary tool applying the rollers radially to the surface causes the peaks to flow into the valleys and the valleys to flow upward toward the peaks, creating a plateau profile whose contact plane is much less sharp than it would be after abrasion. This is important, as a common misunderstanding is that roller burnishing simply smears or pushes over the peaks to make the part smoother. Rather, cold flowing actually stimulates the material both at the peaks and a few thousandths of an inch down beneath the surface, flowing them together. Because the finish comes from subsurface effects, a burnished surface is not only smoother but also work-hardened for greater durability. Cogsdill’s Roll-a-Finish burnishing tools can be applied on a variety of ID and OD diameters, flat surfaces, tapers, contours, and fillets for final finishes down to 2 to 4 microinches Ra.
Which Parts Work for Roller Burnishing?
In the slideshow above, there is a photo of a sample part, with the unfinished surface on the left and the finished surface on the right. There are a couple things to note here. First, roller burnishing is fast and repeatable; the finish seen above was accomplished in less than 2 seconds. Cogsdill counts the fact that its tools can size, finish and work-harden parts in a single seconds-long operation as a principal benefit over grinding, honing or lapping.
Something else to note is part preparation. Not every part is suited to finishing by burnishing. Cogsdill outlines some requirements for parts that are ideal for optimum roller burnishing results:
- Material: Though almost any metal can be successfully roller burnished, ductile or malleable metals are best (for example, steel, stainless steel, steel alloy, cast iron, aluminum, copper, brass and bronze).
- Hardness: Hardness should be less than 40 HRC, ideally. (Some materials as hard as 45 HRC can be effectively burnished as well.)
- Uniformity: As evident in the sample part above, the finish depends on a uniform and tear-free surface in order for the peaks and valleys to cold flow correctly.
- Roughness: An initial 80- to 120-microinch (2- to 3-micron) surface is ideal for roller burnishing. The rougher starting finish allows for a more dramatic change in the final finish because the rollers can apply greater pressure to more of the surface.
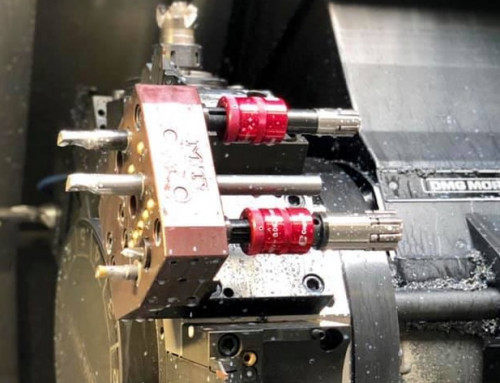
Cogsdill’s tools are versatile and can be used on lathes, drill presses, machining centers and rotating spindles. The standard tool models are designed for right-hand rotation, with either tool or part rotating. An adjustment collar on Cogsdill’s roller burnishing tools enables the operator to set the rollers to the required diameter. The operator unlocks the collar from the interlocking bearing collar and rotates it, altering the position of the tapered mandrel relative to the tapered rolls, thereby changing the effective tool diameter. The tool can be adjusted in 0.0001-inch increments. The company’s focus lately has been on its smaller-size tools, whose compact design and rear-located adjustment mechanism enable use on multi-spindle automatic lathes and Swiss-type machines.
This article first appeared in Modern Machine Shop, 1st September 2017.

Leave A Comment